
To build a racing drone, start by gathering the essential components, including a frame, motors, propellers, flight controller, and battery. Once you have your parts, follow a structured assembly and configuration process to ensure your drone is fast, agile, and ready for the track. This guide provides a thorough overview of each step involved in building a high-performance racing drone, emphasizing the importance of quality components and precise assembly techniques to achieve optimal results.
Understanding the Components

The core of any racing drone lies in its components. The primary parts include the frame, motors, propellers, flight controller, and battery.
1. Frame: This is the skeleton that holds all the parts together. A lightweight yet durable frame can significantly influence the drone’s agility and speed.
2. Motors: These are responsible for thrust and maneuverability. Selecting motors that provide the right balance of power and weight is crucial for racing performance.
3. Propellers: They convert motor power into lift. The size and pitch of the propellers can affect speed and control, making their selection a critical aspect of drone design.
4. Flight Controller: This is the brain of the drone, processing inputs from the pilot and stabilizing the drone during flight. A high-quality flight controller enhances performance and responsiveness.
5. Battery: The power source for your drone. A battery with a good discharge rate and capacity can provide the necessary power for long races without compromising performance.
Choosing quality components is essential for ensuring durability and performance. Investing in reputable brands can prevent malfunctions during critical moments and contribute to a more enjoyable flying experience.
Choosing the Right Frame

When selecting a frame for your racing drone, you’ll encounter various types, including quadcopters, hexacopters, and even custom designs.
– Quadcopters: The most common frame type for racing drones, they offer a balanced configuration that excels in speed and agility. Their four propellers provide a good lift-to-weight ratio, making them ideal for competitive racing.
– Hexacopters: While generally heavier and more complex, hexacopters offer redundancy; if one motor fails, the drone can still operate. However, they may not provide the same speed as quadcopters.
When choosing a frame, consider factors like weight, size, and design. A lightweight frame allows for faster acceleration and agility, while a compact design can improve maneuverability in tight racing conditions. Additionally, ensure that the frame is built from durable materials, such as carbon fiber or reinforced plastics, to withstand the rigors of racing.
Selecting Motors and Propellers
Choosing the right motors and propellers is critical for achieving optimal performance.
1. Motors: Focus on the thrust-to-weight ratio; ideally, your motors should generate three to five times the weight of the drone in thrust. For example, if your drone weighs 500 grams, the combined thrust from your motors should be at least 1500 to 2500 grams for optimal performance.
2. Propellers: The size and pitch of the propellers will affect speed and handling. Larger propellers can generate more lift but may reduce overall speed due to increased drag. Conversely, smaller propellers can enhance speed but may limit lift. A common size for racing drones is 5 to 6 inches in diameter, with a pitch of 3 to 5, providing a good balance of speed and maneuverability.
Experimenting with different motor and propeller combinations can help you fine-tune your drone for specific racing conditions or personal preferences.
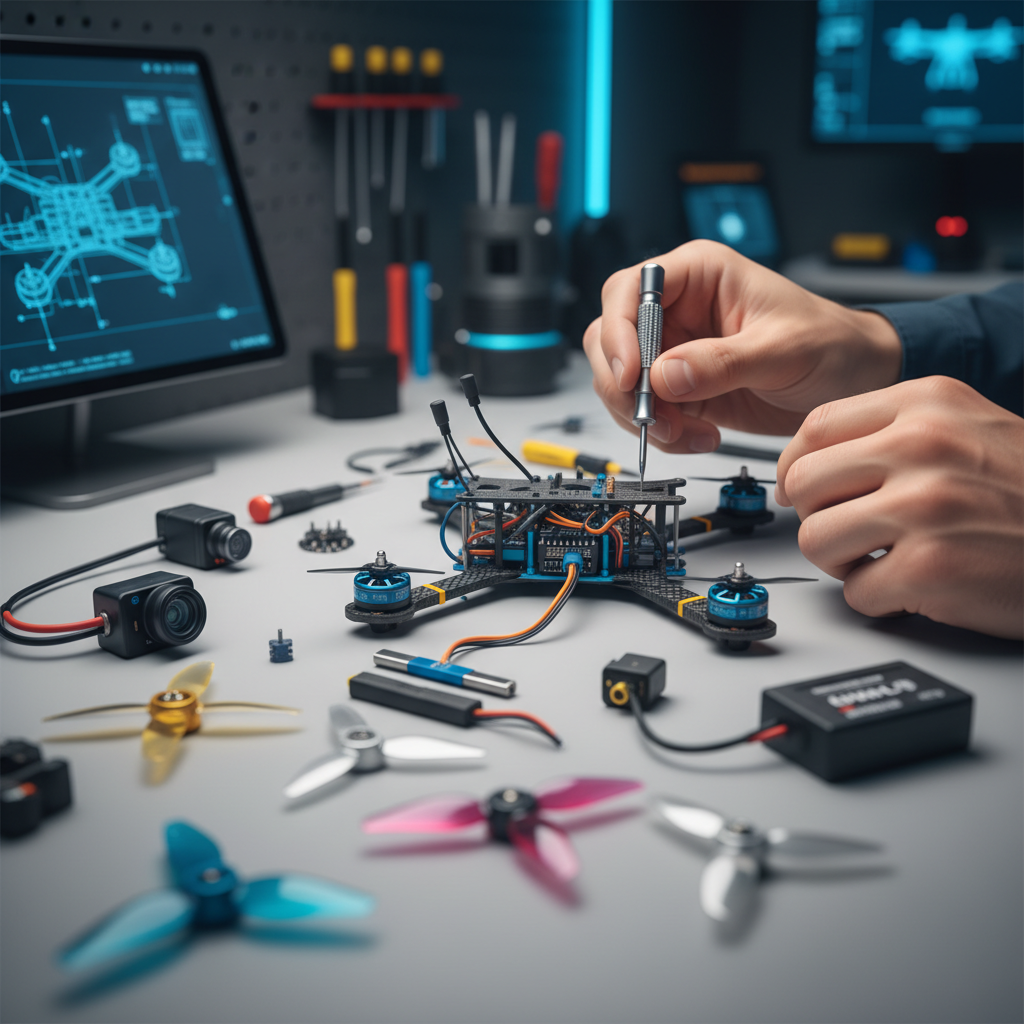
Assembling the Drone
Once you have gathered your components, it’s time to assemble your racing drone. Follow these step-by-step instructions:
1. Attach the Frame: Begin by assembling the frame according to the manufacturer’s instructions, ensuring all parts are securely fastened.
2. Install the Motors: Attach the motors to the designated mounts on the frame. Make sure to use the correct screws and avoid overtightening, which could damage the frame.
3. Connect the Electronic Speed Controllers (ESC): Each motor requires an ESC to control its speed. Connect the ESCs to the motors and then to the flight controller, ensuring proper orientation to prevent any wiring errors.
4. Attach the Flight Controller: Secure the flight controller to the frame, typically at the center for balanced weight distribution. Ensure that it is level for accurate readings during flight.
5. Install the Propellers: Attach the propellers to the motors, ensuring they are correctly oriented for the intended flight direction.
6. Connect the Battery: Integrate the battery with the power distribution board, ensuring all connections are secure and insulated.
For wiring, use zip ties or heat shrink tubing to keep cables organized and prevent them from interfering with moving parts. Properly securing components will minimize the risk of damage during flights and improve overall reliability.
Configuring the Flight Controller
Configuring the flight controller is a critical step that dictates how your drone will respond to pilot inputs.
1. Initial Setup: Connect the flight controller to your computer and install the appropriate software (such as Betaflight or Cleanflight). Follow the software prompts for initial configuration, which includes calibrating the accelerometer and setting up the receiver.
2. Key Settings: Pay particular attention to PID (Proportional, Integral, Derivative) tuning, which adjusts the drone’s responsiveness. Start with default values and adjust them based on test flights. Lower P values can stabilize the drone, while higher values can enhance responsiveness but may lead to oscillations.
3. Fail-Safe Settings: Configure fail-safe settings to ensure that the drone can land safely in case of signal loss. This is crucial for avoiding crashes during races.
4. Flight Modes: Set up various flight modes, such as acro mode for advanced pilots and angle mode for beginners. This versatility can help you adapt to different racing conditions.
Thoroughly reviewing the flight controller configuration will ensure that your drone operates smoothly and efficiently, enhancing your racing experience.
Testing and Fine-Tuning
Before hitting the racing circuit, conduct initial test flights to ensure that your drone is functioning correctly.
1. First Flight: Perform a series of short test flights in an open area, starting with low altitude to assess stability and control.
2. Troubleshooting: If you encounter issues, check your wiring connections, ESC calibration, and PID settings. Common problems include drifting, unresponsive controls, or unexpected crashes.
3. Fine-Tuning: Based on your observations, make adjustments to the flight controller settings. For instance, if the drone is too responsive, consider lowering the P value in your PID settings. Conversely, if it feels sluggish, you may want to increase the rates.
4. Advanced Adjustments: After mastering basic flight, explore advanced tuning options, including rates and expo settings, to tailor the drone’s responsiveness to your piloting style.
Regular testing and fine-tuning will help you refine your racing drone’s performance, ensuring it is competitive on the track.
Racing Tips and Techniques
Once your drone is ready, it’s time to hone your racing skills.
1. Turning Techniques: Practice smooth, controlled turns to maintain speed. Use your throttle and roll inputs effectively to navigate corners without losing momentum.
2. Acceleration Management: Learn to manage acceleration to optimize your speed on straights. Gradual throttle increases can help maintain control and prevent overcorrections.
3. Altitude Management: Keep the drone at an optimal altitude to avoid obstacles while maximizing speed. Lower altitudes can increase speed but may risk control if you encounter unexpected terrain.
4. Practice Makes Perfect: Continually practice flying in various conditions and environments. This will improve your piloting skills and enhance your understanding of how your drone responds to different inputs.
Incorporating these strategies into your racing routine can significantly improve your competitive edge.
Building a racing drone is an exciting project that combines engineering and piloting skills. By following these steps and continually refining your setup, you can create a high-performance racing drone ready for the challenge. As you gain experience, you will not only enhance your technical skills but also enjoy the thrill of racing in a vibrant community. Happy flying!
Frequently Asked Questions
What components do I need to build a racing drone?
To build a racing drone, you’ll need several key components: a frame (typically made of lightweight materials like carbon fiber), motors (usually brushless), electronic speed controllers (ESCs), a flight controller, propellers, a battery (LiPo is common), and a video transmission system. Additionally, consider an FPV (First Person View) camera and goggles for immersive flying experiences. Each component should be compatible with one another to ensure optimal performance.
How do I choose the right frame size for my racing drone?
The right frame size for your racing drone largely depends on your flying style and the type of racing you plan to engage in. Generally, racing drones come in sizes ranging from 90mm to 250mm, with 250mm being the most common for racing. A larger frame offers stability and the ability to carry more weight, while a smaller frame is more agile and faster, making it crucial to select a size that aligns with your racing goals and personal preference.
Why is a proper tuning of the flight controller essential for racing drones?
Proper tuning of the flight controller is essential for racing drones because it directly influences the drone’s responsiveness, stability, and overall performance. A well-tuned flight controller allows for smoother maneuvers and better handling, which is vital during high-speed races. Additionally, tuning can help minimize wobbling and improve the drone’s ability to maintain altitude and navigate turns effectively, giving you a competitive edge on the racecourse.
What is the best battery type for a racing drone?
The best battery type for a racing drone is typically a LiPo (Lithium Polymer) battery due to its high energy density, which provides a good balance of weight and power. Look for batteries with a higher C-rating, as this indicates the battery’s ability to discharge quickly, which is crucial for racing applications. A common choice among racers is a 4S (14.8V) battery, which offers a great combination of power and flight time, allowing for exhilarating racing experiences.
Which software should I use for configuring my racing drone?
For configuring your racing drone, popular software options include Betaflight, Cleanflight, and INAV, with Betaflight being the most widely used among racing enthusiasts. These software programs allow you to customize flight settings, tune PID values, and manage all aspects of your drone’s performance. They offer user-friendly interfaces and a wealth of community support, making it easier to optimize your drone’s capabilities for racing.
References
- https://en.wikipedia.org/wiki/Drone_racing
- https://www.scu.edu/engineering/centers/robotics/research-projects/drone-racing/
- https://www.aaas.org/news/drone-racing-sport-future
- https://www.theguardian.com/technology/2020/feb/15/drone-racing-is-the-future-of-sport
- https://www.nasa.gov/feature/nasa-drones-to-compete-in-drone-racing-championships
- https://www.faa.gov/uas/faq/
- https://www.societyofrobotics.com/building-a-drone/
- https://www.frontiersin.org/articles/10.3389/frobt.2020.00017/full
