
To make a DIY drone in five easy steps, start by gathering sturdy materials like a carbon fiber frame, suitable motors, and a reliable flight controller. Next, assemble the frame securely, aligning the arms and landing gear for stability. Then, install brushless motors and propellers, ensuring tight connections. Connect the electronics, including the flight controller and ESCs, and check all wiring. Finally, perform tests for safety and responsiveness before flight. For detailed insights, continue to the next steps.
Gather Your Materials
Before diving into your DIY drone project, you’ll need to gather specific materials to guarantee everything runs smoothly. Prioritize drone safety by selecting components that meet or exceed quality standards. Start with a sturdy frame, typically made from carbon fiber or plastic. Next, choose motors that provide adequate thrust for your drone’s size. Don’t forget the Electronic Speed Controllers (ESCs) to manage motor functions effectively. For power, a reliable battery, like a LiPo, is essential. Additionally, pick a flight controller compatible with your components for seamless integration. Finally, gather propellers suited for your drone’s specifications. By focusing on material selection, you ascertain your drone not only flies well but also operates safely, giving you the freedom to explore the skies with confidence. Incorporating a Potensic 4K gimbal can significantly enhance your aerial footage stability, making your drone experiences even more enjoyable. A well-constructed aerodynamic design can also improve flight performance by reducing air resistance and enhancing stability.
Assemble the Frame
As you commence on assembling the frame of your DIY drone, precision is key to ensuring stability and performance. Begin by selecting your frame materials—carbon fiber, aluminum, or plastic are popular choices based on weight and durability. Each material affects your drone’s overall design; lighter frames enhance flight time, while sturdier options offer protection against crashes. Additionally, consider the material quality of your chosen frame, as it significantly influences your drone’s performance and longevity.
Next, follow your frame design meticulously, ensuring all components fit snugly. Use screws and brackets to secure joints, preventing any wobble during flight. Double-check the alignment of arms and landing gear, as misalignment can lead to aerodynamics issues. Once your frame is properly assembled, you’ll have a solid foundation for the next steps in your drone-building journey. Additionally, consider the importance of stability when selecting your frame design, as it directly influences your drone’s flight performance. Enjoy the freedom of flight that awaits!
Install the Motors and Propellers
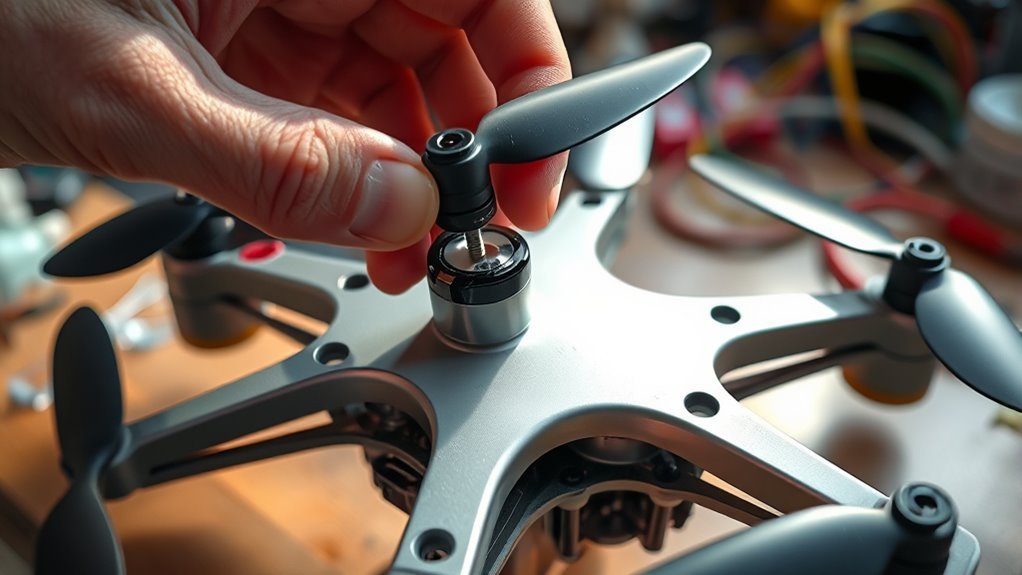
Once you’ve securely assembled the frame, installing the motors and propellers becomes the next critical step in your DIY drone project. Start by selecting motor types that match your frame’s weight and intended use. Brushless motors are popular for their efficiency and power. Mount each motor securely, ensuring they’re aligned with the frame’s arms for peak performance. When choosing propeller sizes, balance the diameter and pitch to achieve the desired thrust and speed. Larger propellers generate more lift, while smaller ones can enhance agility. The flight time of your drone will also be influenced by the efficiency of the motors you select. Attach the propellers to the motors, ensuring they’re tightened properly to prevent slippage during flight. Double-check everything before moving forward, as a well-installed motor and propeller setup is essential for stable flight and overall success. Understanding the drone’s lifting capacities is crucial for selecting appropriate motors and propellers to match your intended use.
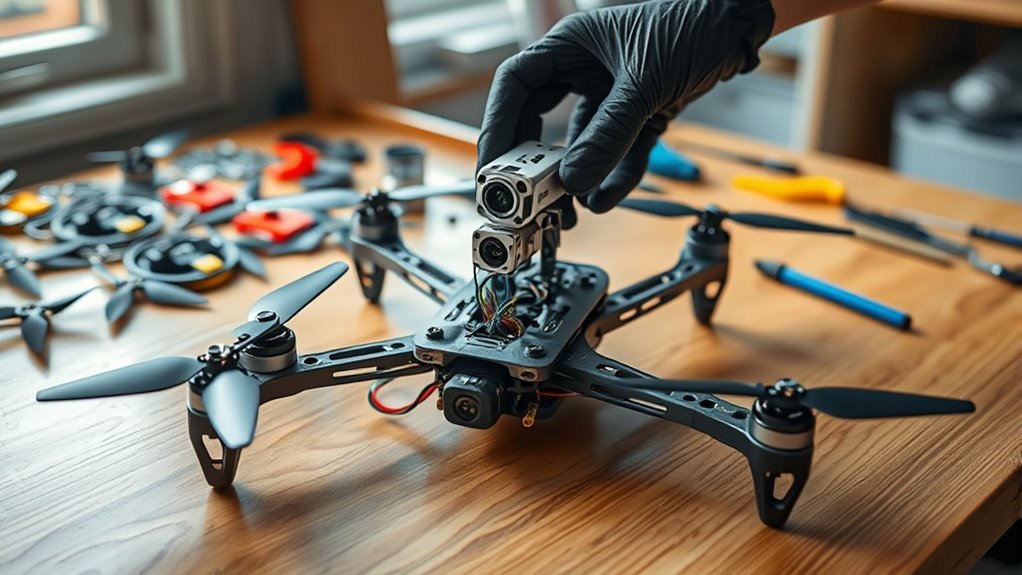
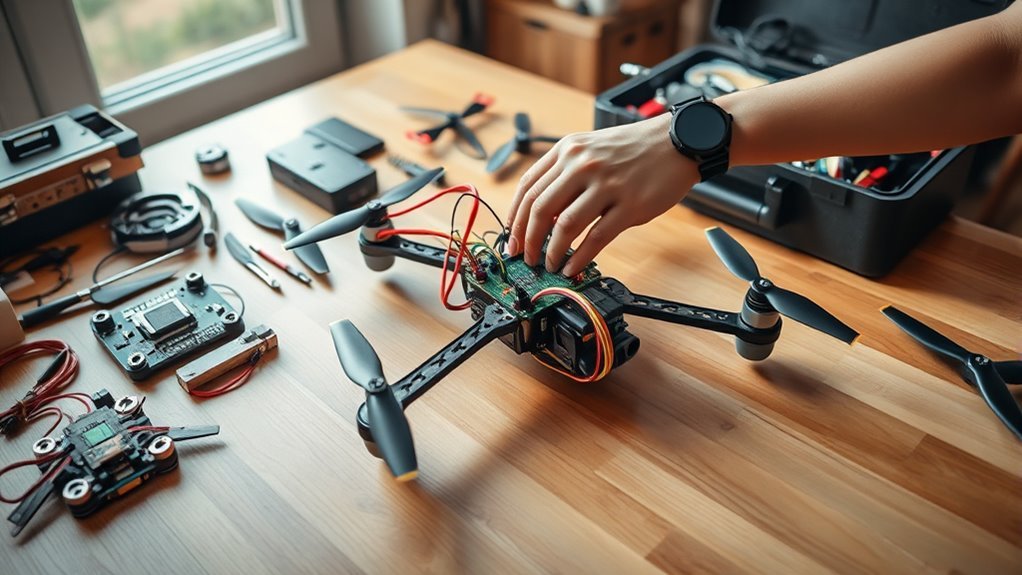
Connect the Electronics
Connecting the electronics is an important step in bringing your DIY drone to life. Start by making the circuit connections between the flight controller, electronic speed controllers (ESCs), and the battery. Make sure each ESC is connected to the corresponding motor, following the correct order for maximum performance.
Next, focus on power distribution. Use a power distribution board or connect wires directly from the battery to the ESCs and flight controller. This guarantees that all components receive adequate power.
Double-check your connections for any potential short circuits, as safety is vital. Additionally, implementing advanced battery technology can optimize power usage, ensuring longer flight times. Finally, secure all wiring to prevent movement during flight. With everything properly connected, you’re one step closer to flying your drone.
Test and Fly Your Drone
Before taking to the skies, it’s crucial to thoroughly test your drone to guarantee everything operates smoothly. Start with a pre-flight checklist to verify drone safety and maintain flight stability. Conduct ground tests on all components, including motors and sensors. Additionally, real-time monitoring can help ensure optimal performance throughout your flight.
| Component | Test Type | Notes |
|---|---|---|
| Motors | Spin Test | Listen for unusual sounds |
| Sensors | Calibration Check | Confirm accuracy |
| Battery | Voltage Check | Verify full charge |
Once tests are complete, choose a calm, open area for your first flight. Gradually increase altitude, monitoring responsiveness. Adjust settings as needed, and enjoy the freedom your DIY drone provides. Always prioritize safety and proper handling! Additionally, consider implementing high-speed quick transfer technology to enhance your data sharing capabilities during flights.
Frequently Asked Questions
What Is the Best Type of Battery for My DIY Drone?
For your DIY drone, lithium polymer (LiPo) batteries are best due to their high energy density and lightweight design. Consider the battery capacity; higher capacity provides longer flight times, enhancing your drone’s overall performance and freedom.
How Can I Improve My Drone’s Flight Time?
To enhance your drone’s flight time, consider that every 100 grams of weight reduction can extend flight duration by up to 15%. Focus on battery optimization and weight reduction for significant improvements in performance and freedom.
Are There Legal Regulations for Flying Drones?
Yes, there are drone regulations you must follow, including obtaining flying permits in many areas. It’s essential to familiarize yourself with local laws to guarantee safe, responsible flying while enjoying your freedom in the skies.
What Safety Precautions Should I Take While Flying?
When flying, you should always follow a pre-flight checklist and establish emergency protocols. Verify your drone’s battery is charged, check for obstacles, and maintain a safe distance from people and property for maximum safety.
Can I Customize My Drone for Specific Tasks?
“There’s more than one way to skin a cat.” You can absolutely customize your drone with task-specific modifications and drone attachments, enabling it to perform various functions like photography, delivery, or surveying efficiently.
