
To construct your own drone, start by understanding essential components like motors, flight controllers, and propellers. Choose a lightweight frame that suits your mission. Select brushless motors for efficiency and match them with appropriate propellers. Install electronic speed controllers (ESCs), ensuring clean wiring and secure connections. Calibrate the drone’s sensors to enhance stability. Before flying, test all systems and troubleshoot any issues. Want to maximize your drone’s performance? There’s more vital information ahead.
Understanding Drone Components
When building your own drone, grasping the essential components is critical for peak performance. Understanding the core elements—motors, flight controllers, batteries, and propellers—allows you to leverage drone technology effectively. Each component must have ideal compatibility to guarantee smooth operation and enhance flight stability. For instance, selecting the right motor size and type directly affects thrust and efficiency, while the flight controller interprets your commands, maintaining stability. The flight controller is essential in stabilizing the drone and ensuring responsive maneuverability. The battery’s capacity determines flight time, so matching it with the weight of your components is paramount. By thoroughly analyzing these elements and their interactions, you can achieve the freedom of customization and performance you desire, creating a drone tailored to your specific needs and flying style. Additionally, considering the right camera system can significantly enhance your drone’s imaging capabilities, similar to the advantages seen in models like the DJI Air 3S.
Choosing the Right Frame
When selecting a drone frame, you’ll need to contemplate both material options and the impact of size and weight on performance. Lightweight materials like carbon fiber offer durability without added heft, while larger frames can accommodate more components but may hinder agility. Balancing these factors is essential for achieving the desired flight characteristics of your drone. Additionally, consider the payload capacity of the frame, as it influences the type of equipment you can carry for specific missions, especially since a sturdy design can enhance longevity and performance in diverse environments.
Frame Material Options
Choosing the right frame material for your drone is essential, as it directly impacts performance, durability, and weight. Here are some popular options to evaluate:
- Carbon Fiber: Lightweight and strong, excellent for high-performance drones.
- Aluminum Alloy: Durable and corrosion-resistant, providing good structural integrity.
- Plastic Composites: Cost-effective and versatile, suitable for beginners or casual use.
- Wood Frames: Offers a unique aesthetic and decent weight distribution, though less durable.
- 3D Printing: Allows for custom designs, enabling freedom in creativity but may vary in strength.
Selecting the appropriate material will greatly influence your drone’s capabilities, so weigh these options carefully based on your intended use and desired performance.
Size and Weight Considerations
While the frame material plays an essential role in your drone’s performance, size and weight considerations are equally important. Achieving optimal weight distribution is vital for stability and maneuverability. When selecting a frame, you should prioritize size optimization to guarantee your drone can carry the necessary components without excessive bulk.
Here’s a quick reference table to help you evaluate frame sizes and their implications:
| Frame Size (cm) | Weight Capacity (g) |
|---|---|
| 250 | 500 |
| 300 | 800 |
| 350 | 1200 |
| 400 | 1500 |
| 450 | 2000 |
Selecting Motors and Propellers
When selecting motors for your drone, understanding the various types available is essential for ideal performance. Additionally, the size of the propellers you choose directly affects your drone’s thrust and efficiency. Balancing these elements will guarantee your drone operates effectively within your intended use case.
Motor Types Overview
Understanding the various motor types is essential for achieving ideal performance in your drone, as the right motor-propeller combination directly influences flight efficiency, stability, and payload capacity. You’ll primarily choose between brushed motors and brushless motors.
- Brushed Motors: Generally cheaper and simpler, but lower motor efficiency and lifespan.
- Brushless Motors: Offer higher motor efficiency, greater thrust, and longer durability, making them popular for advanced builds.
- Thrust-to-Weight Ratio: Critical for determining how much payload your drone can carry.
- Motor Size: Affects thrust and efficiency; larger motors typically produce more thrust.
- Voltage Rating: Impacts overall performance and compatibility with your battery setup.
Selecting the right motor guarantees your drone meets your performance expectations and freedom of flight.
Propeller Size Importance
Propeller size plays an essential role in your drone’s overall performance and efficiency. When selecting the right propeller, consider both the diameter and pitch. A larger diameter can increase lift but may require more power, while a higher propeller pitch enhances speed at the cost of efficiency. It’s vital to match these parameters to your motor’s capabilities for ideal thrust and flight time. Additionally, the propeller material considerably affects durability and weight; lightweight materials like carbon fiber offer strength without excess mass, enhancing maneuverability. Balancing these factors not only improves flight performance but also enhances your drone’s agility and responsiveness, allowing you the freedom to explore new aerial possibilities.
Picking the Flight Controller
Choosing the right flight controller is essential for the performance and stability of your drone. It directly impacts how your drone responds to commands and maintains stability in flight. When selecting your controller, consider the following:
Selecting the appropriate flight controller is crucial for your drone’s performance and stability in the air.
- Controller Features: Look for integrated sensors like gyros and accelerometers.
- Firmware Options: Guarantee compatibility with popular firmware like Betaflight or ArduPilot.
- Processing Power: A faster processor improves response time and flight performance.
- Expandability: Check for additional ports for GPS, telemetry, and other accessories.
- User Community: A strong community can provide support and resources for troubleshooting.
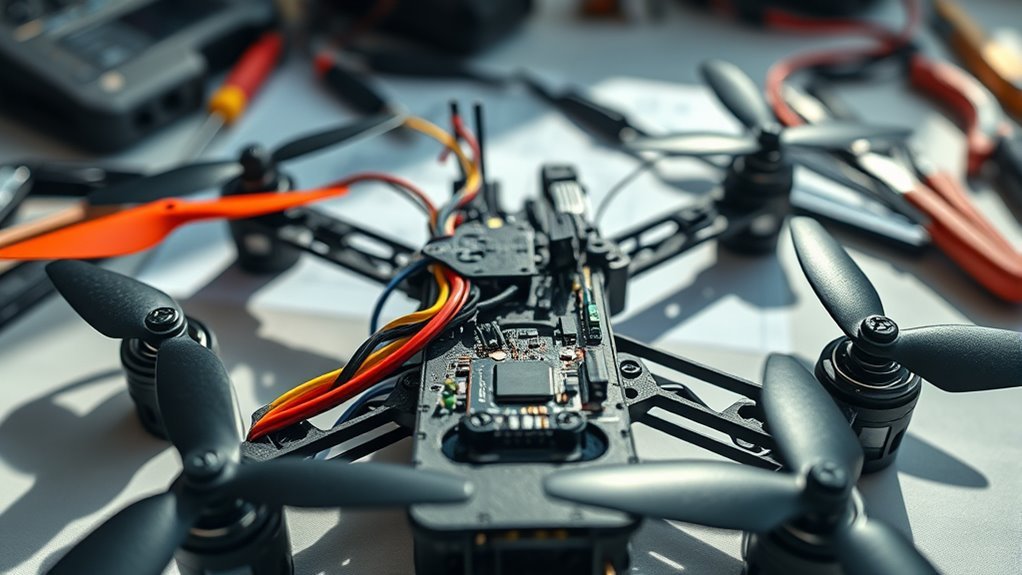
Installing the Electronic Speed Controllers (ESCs)
With the flight controller selected, the next step is installing the Electronic Speed Controllers (ESCs), which play an essential role in regulating the speed of the motors. Proper ESC wiring is vital for peak performance. Start by connecting each ESC to the corresponding motor, confirming polarity is correct. After that, connect the signal wires from each ESC to the flight controller. Follow this table for a quick reference:
| ESC | Motor Connection | Signal Wire Connection |
|---|---|---|
| ESC1 | Motor1 | FC Signal1 |
| ESC2 | Motor2 | FC Signal2 |
| ESC3 | Motor3 | FC Signal3 |
| ESC4 | Motor4 | FC Signal4 |
| ESC5 | Optional | N/A |
Once wired, proceed with ESC programming to calibrate the speed settings. This step guarantees responsiveness during flight.
Wiring and Connecting Components
When constructing your drone, the wiring and connecting of components are essential for guaranteeing ideal functionality. Proper soldering techniques are vital for creating strong, reliable connections. You’ll also need to focus on wire management to prevent interference and maintain a clean build.
Wiring and connecting components are crucial for drone performance; focus on soldering and wire management for optimal results.
Consider these key points:
- Use heat shrink tubing for insulation.
- Keep wire lengths uniform to reduce clutter.
- Label wires to simplify troubleshooting later.
- Secure wires with zip ties or adhesive clips.
- Test connections regularly to guarantee stability.
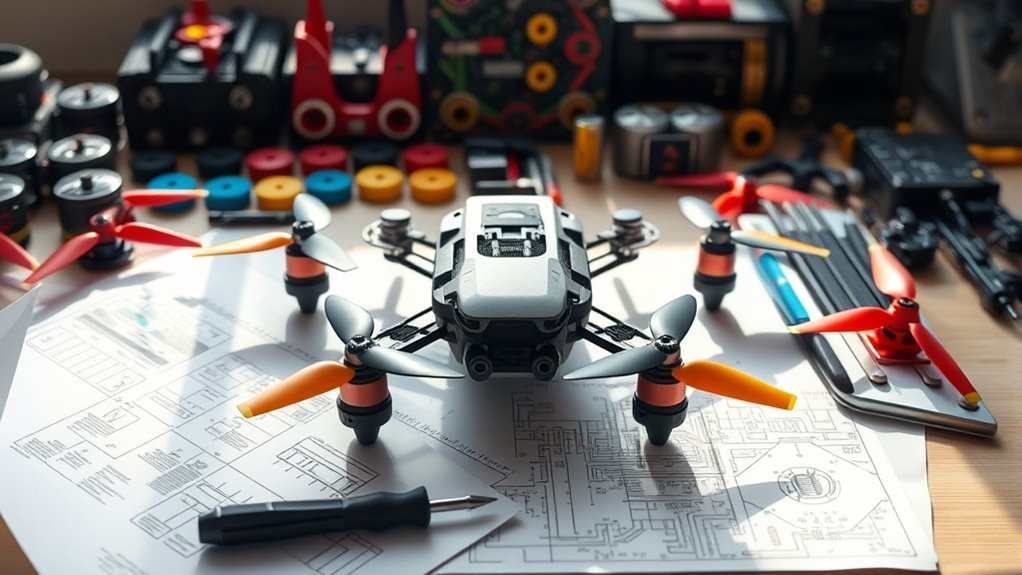
Calibrating Your Drone
After verifying that all components are securely wired and connected, the next step is calibrating your drone to optimize its performance. Begin by using appropriate calibration techniques for your drone sensors, which include accelerometers, gyroscopes, and compass modules. Start with the accelerometer calibration; place your drone on a flat surface and follow the software prompts. For the gyroscope, perform a level calibration by keeping the drone still. Finally, calibrate the compass by rotating your drone in a specific pattern, often a figure-eight. This guarantees that the sensors accurately interpret orientation and position, allowing for precise control. Proper calibration not only enhances flight stability but also empowers you with the freedom to explore the skies confidently.
Testing and Troubleshooting
Before taking your drone for its inaugural flight, it’s crucial to conduct thorough testing and troubleshooting to guarantee all systems are functioning properly. Here are some effective testing methods and troubleshooting tips to confirm your drone’s readiness:
- Check battery levels: Verify your batteries are fully charged and connections are secure. Battery types can greatly influence your drone’s flight duration, so ensure you are using the right one for optimal performance.
- Test controls: Validate that all control inputs respond appropriately.
- Inspect propellers: Look for any signs of damage or misalignment.
- Monitor GPS signal: Confirm strong satellite connectivity for accurate navigation.
- Review firmware: Make sure your drone’s firmware is up-to-date to avoid operational issues. Additionally, consider the impact of battery capacity on your drone’s flight time and overall performance.
Preparing for Your First Flight
How do you guarantee a smooth and successful first flight with your newly constructed drone? Start with a thorough pre-flight checklist. Verify all components are secured, including propellers and camera mounts. Check for firmware updates and calibrate the drone’s sensors. Next, focus on battery management; fully charge your batteries and inspect them for damage or swelling. It’s critical to balance flight time with performance, so consider carrying a spare battery for extended sessions. Understanding the extended flight time of your drone can also help you plan your flights more effectively. Choose an open area away from obstacles and people for your maiden voyage. Finally, familiarize yourself with the controls and practice basic maneuvers in a controlled environment. With this preparation, you’ll enhance your chances of a trouble-free first flight, paving the way for exhilarating aerial adventures. Additionally, understanding the importance of battery life and efficiency will help you optimize your drone’s performance during flights.
Frequently Asked Questions
What Tools Do I Need for Drone Construction?
For drone assembly, you’ll need essential equipment like a soldering iron, multimeter, screwdrivers, and wire cutters. Having these tools guarantees you can effectively construct, troubleshoot, and customize your drone for peak performance and personal freedom.
How Much Does It Cost to Build a Drone?
Building a drone can feel like crafting a spaceship! Drone components pricing varies widely; you can find budget-friendly options to keep costs manageable, typically ranging from $200 to $1,000, depending on your desired features and specifications.
Can I Use Recycled Parts for My Drone?
Yes, you can use recycled materials for your drone. This approach enhances drone sustainability, reduces costs, and allows for creative solutions. Just guarantee the components meet performance standards to maintain safety and functionality during operation.
Are There Legal Restrictions for Flying Drones?
You might think flying drones is free and easy, but there’re drone regulations you need to follow. Often, flying permits are required, especially in populated areas, so always check local laws before taking off.
How Do I Maintain My Drone After Construction?
To maintain your drone, use effective cleaning techniques to remove dirt and debris. Regularly check and care for the battery, ensuring it’s charged correctly and stored properly, enhancing performance and extending its lifespan.
